Introduction to How to use cardboard baking cups
Discover the simplicity and convenience of enhancing your baking experience with cardboard baking cups. These versatile cups are not just containers; they are your key to effortless baking and charming presentation. In this guide, we’ll walk you through the essentials of using cardboard baking cups, unlocking a world of easy, mess-free, and delightful baking. Let’s dive into the art of elevating your treats with the help of these simple yet impactful tools.
Choosing the Right Cardboard Baking Cups
When embarking on your baking journey, the first crucial step is selecting the perfect How to use baking cup for cupcakes. Consider the following factors to ensure a seamless baking experience:
- Size Matters: Choose baking cups that match the size of your intended treats. Whether you’re making cupcakes, muffins, or individual desserts, the right size ensures even baking.
- Material Considerations: Cardboard baking cups come in various materials, including standard paper and grease-resistant options. Assess your recipe’s needs to determine the most suitable material for your cups.
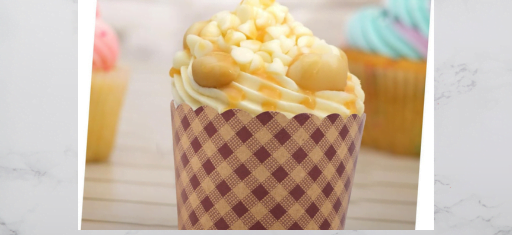
- Design Appeal: Elevate the visual appeal of your baked goods by opting for cups with attractive designs. From classic patterns to vibrant colors, the right design adds a touch of charm to your treats.
- Eco-Friendly Options: For environmentally conscious bakers, explore eco-friendly to use baking cups for cupcakes made from sustainable materials. Ensure your baking journey aligns with your commitment to reducing environmental impact.
By carefully considering these factors, you set the foundation for successful baking adventures with cardboard cups, ensuring that your treats not only taste delicious but also look visually appealing. The right choice of how to use cardboard baking cups is the gateway to a delightful baking experience.
Placing Baking Cups in the Pan
With your oven and pan prepped, the next step is strategically placing your how-to-use cardboard baking cups in the pan. Follow these guidelines for optimal results:
- Even Spacing: Arrange How to use baking cups for cupcakes with equal spacing to ensure that heat circulates evenly around each cup. This prevents uneven baking and ensures uniform results.
- Consider Cupcake Pans: If you’re baking cupcakes, consider using a cupcake pan with individual compartments for each cup. This not only maintains the shape of your treats but also simplifies the overall baking process.
- Stability Matters: Ensure that the cups are stable and won’t tip over during the baking process. A stable arrangement prevents spills and helps maintain the intended shape of your baked goods.
- Single or Double Layer: Depending on the recipe and the type of cardboard baking cups you’re using, you may choose to bake in a single layer or opt for a double-layer arrangement. Follow the recipe instructions for the best outcome.
- Avoid Overcrowding: Resist the temptation to overcrowd the pan. Providing ample space between cups allows for proper air circulation, promoting even baking and preventing undesirable merging of treats.
By following these placement guidelines, you set the stage for a successful baking experience. The careful arrangement of How to use baking cups for cupcakes ensures that each treat receives the attention it deserves in the oven, resulting in perfectly baked and visually appealing goodies. Now that your cups are in place, it’s time to move on to the next step: filling them with delicious batter or dough.
Filling the Baking Cups for cupcakes
Now that your Baking Cups for cupcakes are perfectly positioned, it’s time to focus on the heart of your baked treats – the batter or dough. Follow these tips for precise and mess-free filling:
- Use the Right Tools: For accuracy, use a spoon, ice cream scoop, or piping bag to fill the how to use Baking Cups for cupcakes. This ensures consistent portions and minimizes spills.
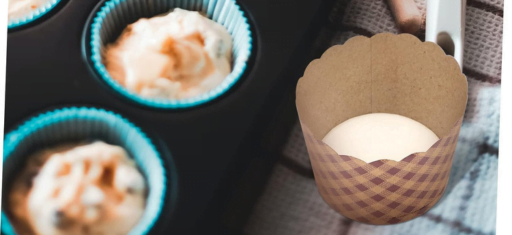
- Fill to the Right Level: Refer to your recipe instructions to determine the appropriate fill level for each Baking Cups for cupcakes. Overfilling can lead to uneven baking and spillage, while underfilling may result in flat treats.
- Consider Flavors and Layers: If you’re creating layered or flavored treats, plan your filling accordingly. Add layers of different batters or complementary flavors to enhance the overall taste experience.
- Smooth the Tops: After filling, use the back of a spoon or a spatula to smooth the tops of the batter or dough in each cup. This promotes an even surface and professional-looking results.
- Cleanup Edges (if necessary): Wipe off any spills or excess batter around the edges of the cups to prevent burning and ensure a neat presentation.
- Customize with Toppings (optional): For an extra touch, consider adding toppings like chocolate chips, nuts, or sprinkles to the batter before baking. This adds visual appeal and additional flavors.
By paying attention to the filling process, you guarantee that each how to use cardboard baking cups for cupcakes holds the perfect amount of batter or dough, setting the stage for delicious and aesthetically pleasing treats. As you move forward, the next step is to set the correct baking time and temperature to bring your creations to life.
Prepping Your Oven and Baking Pan for How to use baking cup for cupcakes
Before diving into the baking process, it’s essential to prepare your oven and baking pan to create the perfect environment for your treats. Follow these guidelines:
- Preheat Your Oven: Start by preheating your oven to the temperature specified in your recipe. This ensures even baking and helps your treats rise appropriately.
- Position Oven Racks: Adjust the oven racks to the recommended position based on your recipe. Different recipes may require placing the racks at specific heights to achieve optimal results.
- Choose the Right Baking Pan: Select a baking pan that accommodates your Baking Cups for cupcakes comfortably. Ensure there is enough space between cups for even heat distribution.
- Grease or Line the Pan (if necessary): Depending on your recipe, grease the baking pan or use additional cardboard cupcake liners to prevent sticking. Some How to use baking cups for cupcakes are designed to be grease-resistant, but it’s essential to check your specific cups’ instructions.
- Check Oven Temperature Accuracy: Use an oven thermometer to verify that your oven temperature matches the setting. Accurate temperature is crucial for achieving the desired texture and flavor.
By taking these preparatory steps, you establish the foundation for a successful baking process. Your oven and baking pan become allies in creating delectable treats that not only taste great but also boast a perfect texture and appearance. With the environment set, it’s time to move on to placing the Baking Cups for cupcakes in the pan and bringing your recipes to life.
Baking Time and Temperature
Achieving the ideal texture and flavor in your baked treats relies heavily on precise baking time and temperature. Follow these guidelines to ensure perfection:
- Refer to Recipe Instructions: Always consult your recipe for specific baking time and temperature recommendations. Each recipe may have unique requirements based on the type of treat you’re making.
- Preheating Impact: The preheating process plays a crucial role. Ensure your oven is fully preheated before placing the baking pan inside. This sets the stage for consistent baking from the beginning.
- Avoid Opening the Oven Frequently: Resisting the urge to open the oven door frequently is key. Opening the door can lead to temperature fluctuations, affecting the overall baking process.
- Use a Timer: Set a timer to monitor the baking progress. This helps prevent over-baking and ensures that your treats are perfectly cooked.
- Rotate the Pan (if necessary): To promote even baking, consider rotating the baking pan halfway through the baking time. This is especially important for recipes that require longer baking durations.
Checking for doneness the cupcake-baking procedure
As the baking time nears completion, it’s crucial to employ effective methods to determine whether your treats are perfectly baked. Follow these steps to ensure your cardboard baking cup creations reach the desired doneness:
- Visual Inspection: Observe the color of the tops of your treats. A golden-brown hue often indicates that they are ready. However, the specific color may vary depending on the type of treat and recipe.
- Spring-Back Test: Gently press the tops of your treats with your fingertip. If they spring back, it’s a good sign that they are done. Avoid pressing too hard to prevent deformation.
- Toothpick Test: Insert a toothpick or cake tester into the center of one treat. If it comes out clean or with a few moist crumbs (depending on your recipe), it indicates that the treats are adequately baked.
- Internal Temperature (if applicable): For certain treats, especially those containing eggs, checking the internal temperature with a food thermometer is essential. Refer to your recipe for the recommended temperature.
- Avoid Over-Baking: Keep in mind that treats continue to cook slightly after being removed from the oven due to residual heat. To prevent over-baking, take them out just as they reach the desired doneness.
By employing these methods, you ensure that your treats are perfectly baked, retaining the desired texture and flavor. Now, as your baked goods cool, the next step is to safely remove them from the cardboard baking cups for further decoration and presentation.
Cooling and Removing Baked Goods for cardboard cupcakes
Once your treats have achieved the perfect doneness, it’s time to transition from the oven to the final presentation. Follow these steps to cool and safely remove your baked goods from the cardboard baking cups:
- Cooling Time: Allow your treats to cool in the baking pan for a few minutes. This initial cooling period helps them set and makes removal easier.
- Transfer to a Cooling Rack: After the initial cooling, transfer the treats to a cooling rack. This promotes even cooling and prevents the formation of condensation, which can affect texture.
- Patience is Key: Resist the temptation to remove treats from the cardboard baking cups immediately. Patience ensures that your treats maintain their shape and don’t fall apart.
- Gentle Removal: Once completely cooled, gently peel away the cardboard baking cups from the treats. If you encounter resistance, use a butter knife to loosen the edges before removal.
- Presentation Side Up: When placing treats on a serving plate, ensure the presentation side is facing up. This highlights the visual appeal created by the cardboard baking cups.
- Dispose or Recycle Responsibly: Dispose of the used cardboard baking cups responsibly or consider recycling them, depending on the material. Many cardboard cups are eco-friendly and can be recycled.
By following these steps, you ensure that your treats not only taste delicious but also look professionally presented. With your baked goods successfully removed from the cardboard baking cups, it’s time to explore creative decoration options and serve up your delightful creations.
How to use baking cups for Decorating and serving cupcakes
With your perfectly baked treats ready, it’s time to add the finishing touches and present them in a visually appealing manner. Consider these ideas for decorating and serving your delights:
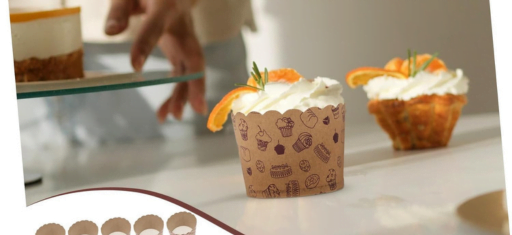
- Frosting and Icing: Elevate the visual appeal of your treats with a layer of frosting or icing. Use piping bags for precise application, and explore different colors and flavors to suit the occasion.
- Sprinkles and Toppings: Add a dash of fun by sprinkling colorful toppings such as sprinkles, chocolate chips, or chopped nuts. These not only enhance the appearance but also introduce additional textures and flavors.
- Edible Decorations: Experiment with edible decorations like fondant shapes, edible pearls, or edible flowers. These decorative elements add a touch of sophistication to your treats.
- Theme-Based Decor: Tailor your decorations to suit the theme or occasion. Whether it’s a birthday, holiday, or special event, incorporating themed decorations enhances the overall presentation.
- Serve on Attractive Platters: Place your decorated treats on attractive serving platters or trays. Consider the overall aesthetic and choose serving ware that complements the theme or mood.
- Individualizing Treats: If serving a variety of treats, consider individualizing each one. This could include different flavors, colors, or decorations to provide a diverse and appealing dessert spread.
By incorporating these decorating and serving tips, you transform your How to use baking cups creations into visually stunning and irresistible treats. Your efforts in presentation not only enhance the overall experience but also make your baked goods a delightful feast for the eyes. Now, as your treats take center stage, it’s essential to shift focus to the cleanup storage and How to use baking cups for future baking adventures.
Cleaning and Storing cardboard Baking Cups
As the final act of your baking adventure, it’s important to wrap up with proper cleaning and storage of your cardboard baking cups. Follow these steps to ensure their longevity and readiness for future use:
- Cool Cups Completely: Before cleaning, ensure that the cardboard baking cups are completely cool. This prevents any potential damage or warping during the cleaning process.
- Dispose of Residual Crumbs: Shake out any residual crumbs from the baking cups into the trash. This initial step simplifies the cleaning process.
- Wipe with a Damp Cloth: Gently wipe the interior and exterior of each cup with a damp cloth. This helps remove any remaining residue or grease.
- Avoid Immersing in Water: While cardboard baking cups for cupcakes are designed to resist grease, avoid immersing them in water. Excessive exposure to water can compromise their structure.
- Air Dry Thoroughly: Place the cleaned baking cups on a drying rack to air dry completely. Ensure they are completely dry before storing them to prevent mold or mildew.
- Store in a Cool, Dry Place: Once dry, store the cardboard baking cups in a cool, dry place. Avoid exposing them to direct sunlight or extreme temperatures, as this can affect their quality.
- Consider Organizing: If you have a collection of different-sized baking cups, consider organizing them for easy access. This ensures you can quickly grab the right size for your next baking endeavor.
By following these cleaning and storage practices, you extend the lifespan of your cardboard baking cups and maintain their functionality for future baking projects. With your baking tools safely stowed away, you’re ready to embark on new culinary adventures armed with the simplicity and convenience of baking cups.
Best cardboard baking cups
When it comes to choosing the best cardboard baking cups, several factors should be considered, such as quality, eco-friendliness, and functionality. One standout option is cardboard baking cups. These cups are crafted from sturdy, food-safe cardboard that ensures even baking and maintains the shape of your treats. What sets apart is its commitment to sustainability; its cups are made from recyclable materials, reducing environmental impact. Additionally, their grease-resistant lining prevents leakage and maintains the integrity of your baked goods. Whether you’re making cupcakes, muffins, or individual desserts, cardboard baking cups offer reliability and eco-consciousness, making them a top choice for bakers looking for quality and sustainability in their kitchen essentials. You can purchase cardboard baking cups directly from their website [Amazon], ensuring convenience and quality for all your baking needs.
Conclusion
In mastering the art how to use cardboard baking cups, you’ve embarked on a journey that transforms simple ingredients into delectable delights. From choosing the right cups and prepping the oven to meticulous filling and decorating, each step contributes to the creation of treats that are not only delicious but visually appealing. The careful balance of baking time and temperature ensures perfection, while the final touches of decoration make your treats irresistible. As you clean and store your cardboard baking cups for future use, you reflect on the joy and simplicity they bring to your baking endeavors. Armed with this guide, you’re well-equipped to infuse your culinary creations with the charm and convenience that baking cups offer. Happy baking!